Two Techniques, One Brand Statement
Foil stamping and embossing are the two most requested logo application techniques for jewelry packaging — and for good reason. Together they account for the majority of what you see on luxury jewelry boxes, pouches, and earring cards from mid-market and high-end brands worldwide. Yet they are often confused with each other, used interchangeably in conversation, and rarely explained with the specificity a brand manager actually needs when making a production decision.
This guide goes deep on both. It covers how each technique works, when to use each one, how they perform across different packaging types and materials, how to combine them for a compound effect, and what to prepare before you brief your supplier. For a broader overview of all six logo application techniques available for jewelry packaging — including screen printing, laser engraving, and embroidery — see our custom logo options guide and the companion service page.
Foil Stamping: How It Works and What It Produces
Hot foil stamping uses a heated metal die pressed against a thin roll of foil. The heat activates the foil's adhesive backing, and the die deposits a precisely shaped layer of metallic or pigment foil onto the packaging surface. The die is then released and the foil carrier peels away — leaving a sharp, clean, reflective mark in the exact shape of the die.
The result is a logo that catches light from multiple angles and reads with strong contrast against almost any background color. Gold foil on navy is the classic jewelry packaging pairing. Silver foil on black. Rose gold foil on blush. Matte gold on kraft. Each combination reads differently, and the foil color should be selected in reference to your packaging's base material and color.
Foil types available:
- Metallic (gold, silver, rose gold, copper, bronze)
- Matte metallic (matte gold, matte silver — increasingly popular for brands seeking a quieter luxury)
- Pigment foil (custom Pantone-matched colors — non-metallic but opaque and vivid)
- Holographic foil (prismatic effect — suited to fashion and trend-forward brands)
The technique requires a custom metal die machined to your logo. This die is a one-time cost, charged on the first order, and is yours to use on all future reorders at no additional die fee. It is also the reason why vector artwork is non-negotiable: the die cutter needs clean, closed paths to machine the die accurately.
Embossing and Debossing: How They Work and What They Produce
Embossing and debossing are pressure techniques. No ink, no foil — only the material itself.
Blind embossing uses a matched pair of dies (a male die and a female counter-die) to press the material upward, creating a logo or pattern that sits raised above the surrounding surface. The impression is visible through reflected light and touch. The effect is tonal and subtle — the logo is in the same material color as the packaging, distinguished only by its three-dimensional relief.
Debossing is the inverse: the die presses the material downward, creating a recessed impression. The surrounding material is undisturbed; the logo sits below the surface. Debossing reads as clean and modern, particularly on leather where the pressed channel reveals the material's internal color variation at the edges of the impression.
Both techniques can be applied without heat on thicker materials, but light heat is typically used to set the impression cleanly on leather, leatherette, and coated boards.
Color fill: Both embossed and debossed impressions can be filled with ink or foil after the press — this is called color fill embossing or foil fill. The result is a logo that is both raised or recessed and colored, combining the tactile quality of the press with the visual impact of color.
Foil Stamping vs. Embossing: A Practical Comparison
| Criterion | Foil Stamping | Blind Embossing | Debossing |
|---|---|---|---|
| Visual impact | High — metallic, reflective, reads at a distance | Low to medium — tonal, close-read | Low to medium — recessed, subtle |
| Tactile quality | Slight — foil is thin, minimal texture | High — raised relief, strong to the touch | High — recessed, distinctive under finger |
| Best background | Dark or deep-colored materials (high contrast) | Any material — tonal is always harmonious | Leather and leatherette where channel edges show |
| Logo complexity | Simple, bold logos work best — fine detail can fill in | Simple, bold logos — fine detail can lose depth | Simple to moderately detailed logos |
| Durability | High — foil is bonded and scratch-resistant when properly applied | Very high — the material itself is shaped | Very high — the impression is permanent |
| Ideal brand tone | Glamorous, confident, celebratory | Understated luxury, minimalist, tonal | Modern, refined, editorial |
| Cost | $ (die fee once, low per-unit) | $ (die fee once, low per-unit) | $ (die fee once, low per-unit) |
The practical rule: if your packaging needs to read from across a retail counter, foil stamp it. If it needs to reward close inspection and touch, emboss or deboss it. If it needs to do both, combine them.

Application by Jewelry Packaging Type
How you apply these techniques should be informed by the packaging format. Surface area, material, and typical viewing distance all vary by packaging type — and each has a technique that performs best.
Ring Boxes
Ring boxes are small. The lid surface is typically 60–90 mm square or rectangular — enough for a centered logo, a monogram, or a short brand name in an elegant typeface. Because the box is held at arm's length and examined closely, blind embossing reads beautifully here. A raised monogram on a navy or black leatherette ring box is one of the most restrained and effective branding statements in jewelry packaging.
Foil stamping on a ring box lid works equally well when you want legibility at the retail counter. Gold foil on a textured leather ring box is a proven combination. For the highest-end positioning, combination stamping (foil over emboss) on the lid of a rigid flip-top ring box communicates a level of care that aligns with the emotional significance of the purchase.
Earring Boxes and Earring Cards
Earring packaging ranges from small rigid boxes (typically 60 x 60 mm) to the increasingly popular earring display card. Each presents different constraints.
On earring boxes, the available branding surface is limited. A simple foil-stamped logo centered on the lid is the most effective approach — the metallic contrast reads clearly even on a small footprint. Debossing works here too, particularly on leatherette and leather boxes, but blind embossing on very small surfaces can lose definition if your logo has fine elements.
Earring cards are a different canvas entirely. They are typically 85 x 55 mm to 90 x 70 mm — roughly business card scale — and are often made from rigid card stock, uncoated board, or kraft. Debossing on thick card creates a premium tactile impression that distinguishes a card from standard hang tags. Foil stamping on card stock pops dramatically, particularly matte gold foil on natural kraft, and requires no additional structural investment beyond the die.
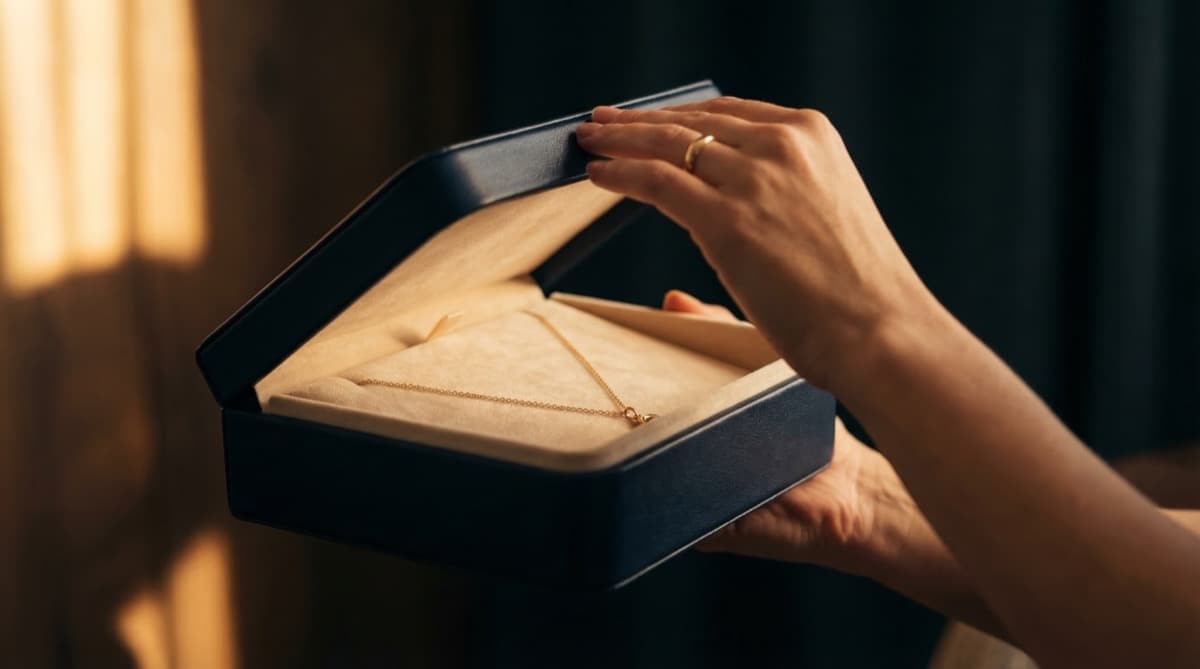
Necklace Boxes
Necklace boxes offer the largest lid surface of any standard jewelry packaging format — typically 170 x 120 mm or larger. This is the right canvas for more expressive branding: a full brand wordmark in foil, an embossed pattern field across the lid surface, or a combination approach with a foil-stamped logo centered on a blind-embossed texture pattern.
On necklace boxes, the interior lid is also a high-value branding location. A foil-stamped message or brand statement on the interior lid lining is revealed only at the moment of opening — an intimate, considered detail that rewards the customer and differentiates your packaging from a box that only brands the outside.
For guidance on choosing the right necklace box format, see our necklace and bracelet packaging guide.
Bracelet Boxes
Bracelet boxes sit between ring boxes and necklace boxes in terms of surface area. The lid is typically 90–100 mm square. Debossing performs particularly well here on full-grain or pebbled leather — the material's natural texture creates a counterpoint to the crisp pressed impression of the logo, making the branding feel intentional and crafted rather than applied.
On a smooth leatherette bracelet box, foil stamping in silver or rose gold reads cleanly and suits brands with fashion-forward or contemporary aesthetics. The combination of a debossed logo with a foil-stamped brand name (two elements, two techniques, one lid) can work on this surface area without feeling crowded — provided the design is properly spaced.
Jewelry Pouches
Leather and fabric pouches are the most material-dependent category for logo application. The technique that works best is almost entirely determined by what the pouch is made of.
On genuine leather pouches — whether drawstring, snap-closure, or envelope style — blind debossing is the standard technique. Leather accepts a deep, clean impression that holds its shape permanently. The result is understated and elegant. Foil stamping on smooth genuine leather works well for brands who want a metallic accent, though the foil must be applied before the pouch is assembled to avoid foil cracking at fold points.
On fabric pouches — velvet, suede, cotton, or linen — embossing and debossing are not viable: fabric does not hold a pressed impression. Screen printing or embroidery are the techniques of choice for fabric. If foil is wanted on a velvet or suede pouch, heat transfer foil (applied via a separate printing process) can be used, though it is less durable than stamped foil and should be tested in sampling.
Material Compatibility: Where Each Technique Performs

The technique you choose must suit the material. Mismatch here is the most common cause of disappointing results at the sampling stage.
Foil stamping performs best on:
- Smooth or lightly textured genuine leather and leatherette
- Coated art paper and specialty papers with a closed surface
- Soft-touch laminate boards (matte finish, excellent foil adhesion)
- Satin ribbon and flat fabric tapes
Foil stamping performs poorly on:
- Deep-grain or heavily pebbled leather (the foil cannot bridge the grain valleys — results appear patchy)
- Uncoated kraft or raw paper (foil adhesion is inconsistent)
- Velvet, suede, or brushed fabrics (surface nap prevents clean transfer)
Blind embossing and debossing perform best on:
- Full-grain, top-grain, and nappa leather — the density holds the impression crisply
- Leatherette — consistent surface accepts uniform depth across the impression
- Rigid paperboard with a paper or linen wrapping (board provides resistance for a clean press)
- Cotton and canvas (moderate results — impression is soft but visible)
Blind embossing and debossing perform poorly on:
- Very thin paper stocks where the die punches through or causes surface tearing
- Rigid plastic or metal surfaces (requires specialized tooling)
- Velvet or pile fabrics (impression flattens but does not hold)
Combining Foil and Emboss: The Case for Combination Stamping
Combination stamping — also called registered foil embossing — applies both techniques in a single press action: the die simultaneously raises the material and deposits foil into the raised area. The result is a logo that is tactile and reflective. You can feel it with your fingertip and see it catch light from across the room.
This is the technique used on the boxes of many heritage and high-end jewelry brands, and it is achievable for mid-market brands at realistic MOQs. The tooling cost is marginally higher than a standard foil die, but the per-unit production cost is comparable because both effects are achieved in one press pass.
A variation is to apply the two techniques separately and in different locations: blind embossing on the exterior lid (for a tonal, tactile brand mark) and foil stamping on the interior lid panel or on a branded belly band (for a flash of color that appears on opening). This layered approach rewards the customer at multiple points during the unboxing sequence and adds depth without requiring combination tooling.
Preparing Your Logo for Foil and Embossing
Both techniques share a set of requirements that differ from screen printing or digital printing:
Vector artwork is mandatory. The die for foil stamping and the plates for embossing are machined from your logo file. Raster images (PNG, JPG) cannot be used directly — they must be redrawn as clean vector paths (AI, EPS, or SVG). If your logo exists only as a raster file, Vela's studio team can redraw it for production as part of the setup process.
Logo simplicity matters. Both techniques perform best with logos that have bold, clear outlines and minimal fine detail. Hairline serifs, small text below approximately 6pt, and intricate illustrative elements can lose definition in the die — particularly in embossing, where fine detail may not achieve sufficient depth to read. A packaging-optimized version of your logo (slightly simplified, with stroke widths regularized) is often worth preparing alongside your standard brand files.
Single-color composition. Foil stamping uses one foil color per pass. Embossing uses no color at all. These are inherently single-element techniques. Multi-color logos require either separate passes (one foil color per pass) or a switch to screen printing for the multi-color elements. Brands with complex logos typically apply a simplified, single-element version of their mark to packaging and use the full brand logo in print materials.
Specify minimum size. Logo files should include a minimum size specification — the smallest size at which all elements of the logo remain legible. For embossed applications, this minimum is typically larger than for screen printing, because the three-dimensional impression requires material mass to read clearly.
MOQ, Timeline, and What to Expect
Custom foil stamped and embossed jewelry packaging from Vela starts at 300 units for boxes and pouches. The first-order timeline includes:
- 2–3 weeks for sampling — die creation, material selection, logo application, and approval
- 3–5 weeks for production following sample sign-off
The sampling phase is where you will see and feel the actual result. Vela produces physical samples with your logo applied to your chosen material in your chosen technique — this is the stage at which to evaluate whether the impression depth, foil brightness, and material combination meet your expectations before committing to production. Adjustments to logo scale, die depth, or foil color are made here, not during production.
Tooling fees (die creation for foil stamping; plate creation for embossing) are charged once, on the first order. All subsequent reorders use the same tooling — there is no repeat setup fee. This means the economics improve significantly on the second and third order, making both techniques very cost-effective over the lifetime of a packaging program. If your design changes, a new die or plate is required, which incurs a new tooling fee.
Working with Your Packaging Partner
The decision between foil stamping, embossing, debossing, and combination stamping is rarely made in isolation. It involves your material choice, your logo complexity, your price point, and what you want the customer to experience the moment they pick up the box. A strong supplier will walk you through the tradeoffs at the brief stage — not present a finished sample that doesn't match your expectations.
For a complete overview of all six logo techniques available across our custom jewelry boxes, pouches, and bags — including screen printing, embroidery, and laser engraving — read our custom logo options guide or visit the custom logo options service page.
Our genuine leather material guide covers how different leather finishes respond to embossing and foil stamping — a useful companion if material selection is still in progress.
When you're ready to see foil and embossing applied to your logo on your chosen material, get a custom quote and request a sampling kit.